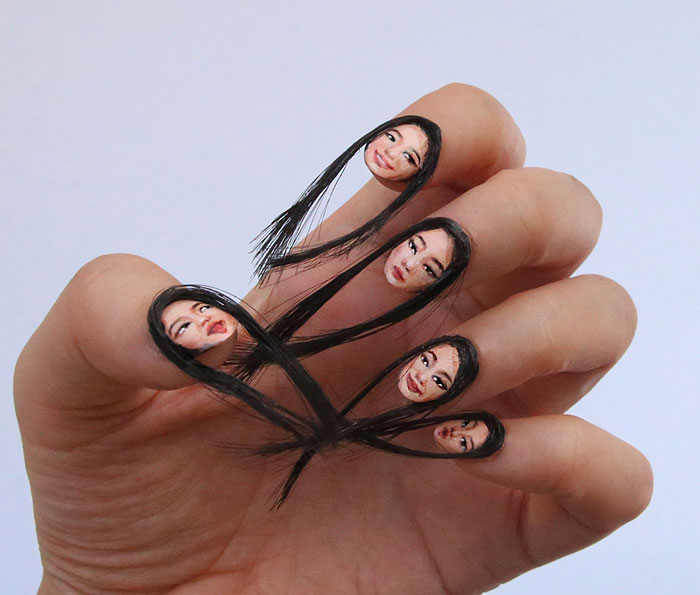
Creative Examples Of Finger Painting
Art
Having A hobby is important not only to add some creativity and
master it but also to be able to put the feelings and emotions into an
absolutely beautiful portrait. Talking of finger painting, let me tell
you that the fun of playing with colors on your hand is not just for the
kids but also for artistic adults like you. This type of painting is
really tough if you actually are interested in creating a unique
masterpiece where your paintbrush is your finger. A lot of skills and
vision to paint down exactly what you had in mind. You don’t need to
talk to explain your painting, just paint! Being able to draw these Creative Examples Of Finger Painting
which are unbelievable will only be possible after you practice various
techniques. Learn and understand all about the finer points to be an
expert at finger painting here.
Image Source


Image Source

Image Source

Image Source

Image Source

Image Source

Image Source

Image Source

Image Source

Image Source
Creative Examples Of Finger Painting
Few Tips First

Image Source

Image Source

Image Source

Image Source
China and America used to be the hub and is the birthplace is finger painting inspiration. Mostly tempera paints and water based paints are used for finger painting. Get set go and learn more about the techniques! Ruth Faison Shaw who is an educator is the one to whom all the credit of innovating this very unfamiliarity beautiful artwork goes to. This finger painting thing once used to be the best therapy for kids and that is when the nontoxic paints came into existence too as a safety precaution for hands.

Image Source

Image Source

Image Source

Image Source

Image Source
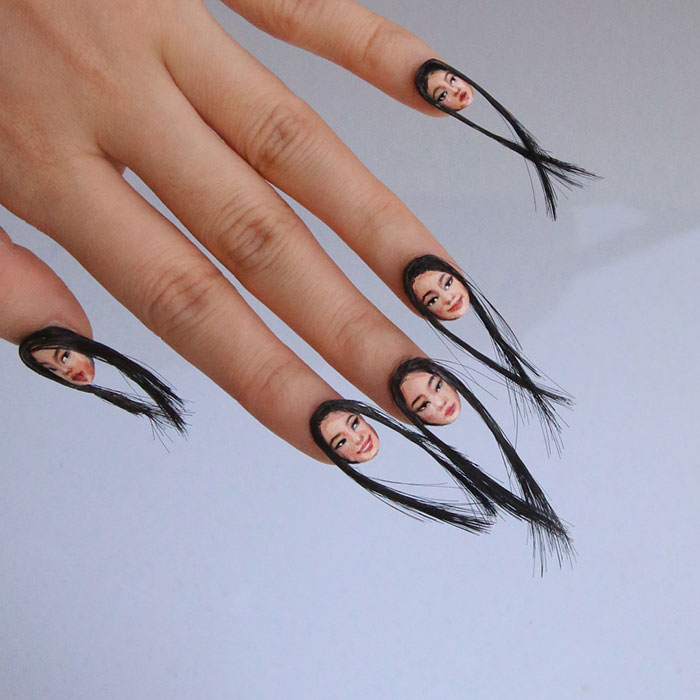
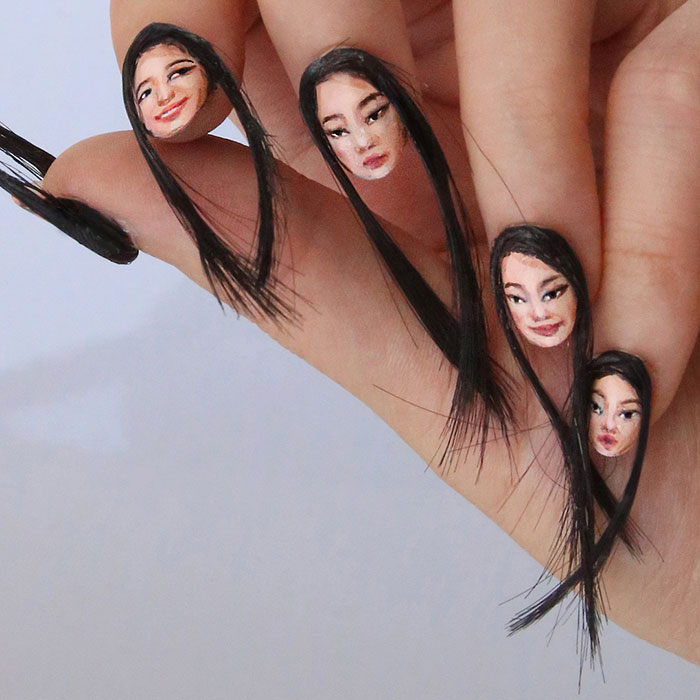
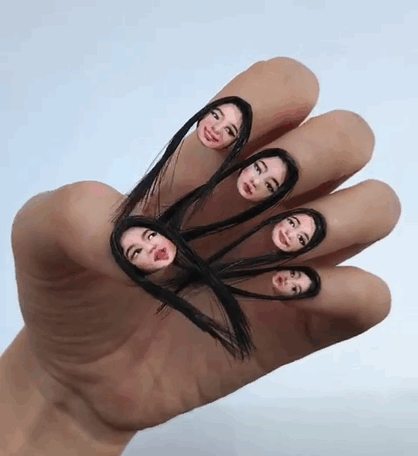
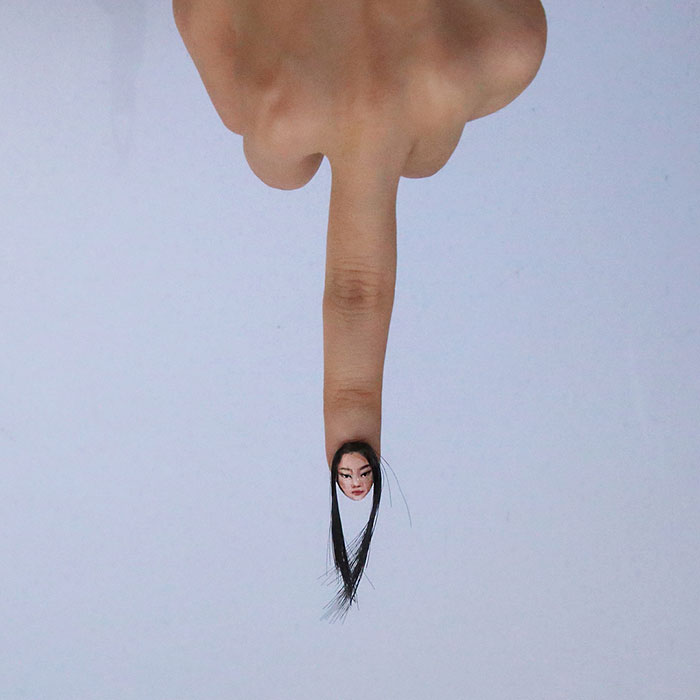
What makes Creative Examples of Finger Painting different from other painting inspirations and innovations is that it doesn’t require any tool since hand itself is the tool used. Unlike, other painting techniques that use brush and different medium of paints that specializes distinctly in every other style. The specialty about Creative Examples of Finger Painting and inspiration is that you can use your fingers, thumb and palm for painting. Sometimes, even the lower arm is used as a tool to paint and give a unique shape to the drawing. You need to have a skillful operation and control on hands as to move them guessing the twists and turns just right.

Image Source

Image Source

Image Source

Image Source

Image Source
Once you become the virtuoso in controlling hand and fingers to depict just the right shape and image, the next step is to find perfect strokes by practicing the same. The better the strokes, the better life will be depicted by your Creative Examples of Finger Painting. Plus the texture! When you master the strokes and hand movements on canvas, this will add a perfect texture to your painting. Just like Impasto painting, finger painting could also be given a thick texture. Who doesn’t love the unintentional height to the Creative Examples of Finger Painting, that too without taking any efforts?

Image Source

Image Source

Image Source

Image Source

Image Source
We all know the wonders of having a hobby or a passion in arts and how much good it does to us. Another example of healing and therapeutic features of Creative Examples of Finger Painting that psychologically indulge in lot of positivity and relaxation putting stress away. It is really amazing how having a love for art and practicing it becomes the reason to keep learning new things. And it is not just the art, that making your life beautiful. It is you (Precisely, your hand and fingers) painting life onto canvas with colors and lots of colors.


Image Source


Image Source

Image Source


Image Source

Image Source

Image Source

Image Source
I remember how my mom taught me drawing a tree using fingers and I loved it. I insist you to teach your kids too and you have these amazingly Creative Examples of Finger Painting that you must try.
Image Source
Image Source
Image Source
Image Source
Image Source
Image Source
Image Source
Image Source
Image Source
Image Source
Creative Examples Of Finger Painting
Few Tips First
- Cover the area where you will paint. The finger painting can get messier sometimes and then the color stinks all around. Covering the area with something that you can clean off or throw away is specially preferred when you are a beginner or you are making your kid crayon a Creative Examples of Finger Painting.
- Tape down the paper or canvas as to avoid its flying and inattentive, sudden moves is yet another important step to take while setting up. No need to stick the canvas majorly while painting in a closed room but taking this measure while you are working out in open space where there is free air running will save your painting from getting ruined!
- Preparing your hands doesn’t simply means washing them up so there is no dirt. But before you actually dip your finger in colors, you would surely want to wet them up. No dripping wet, just wet wet! This will help the colors to easily get on the canvas thinning the paint up.
- You better pour the colors in an empty bowl for easy access and less confusion. Keep a rag cloth aside as to wipe your hand dry and clean.
Image Source
Image Source
Image Source
Image Source
China and America used to be the hub and is the birthplace is finger painting inspiration. Mostly tempera paints and water based paints are used for finger painting. Get set go and learn more about the techniques! Ruth Faison Shaw who is an educator is the one to whom all the credit of innovating this very unfamiliarity beautiful artwork goes to. This finger painting thing once used to be the best therapy for kids and that is when the nontoxic paints came into existence too as a safety precaution for hands.
Image Source
Image Source
Image Source
Image Source
Image Source
What makes Creative Examples of Finger Painting different from other painting inspirations and innovations is that it doesn’t require any tool since hand itself is the tool used. Unlike, other painting techniques that use brush and different medium of paints that specializes distinctly in every other style. The specialty about Creative Examples of Finger Painting and inspiration is that you can use your fingers, thumb and palm for painting. Sometimes, even the lower arm is used as a tool to paint and give a unique shape to the drawing. You need to have a skillful operation and control on hands as to move them guessing the twists and turns just right.
Image Source
Image Source
Image Source
Image Source
Image Source
Once you become the virtuoso in controlling hand and fingers to depict just the right shape and image, the next step is to find perfect strokes by practicing the same. The better the strokes, the better life will be depicted by your Creative Examples of Finger Painting. Plus the texture! When you master the strokes and hand movements on canvas, this will add a perfect texture to your painting. Just like Impasto painting, finger painting could also be given a thick texture. Who doesn’t love the unintentional height to the Creative Examples of Finger Painting, that too without taking any efforts?
Image Source
Image Source
Image Source
Image Source
Image Source
We all know the wonders of having a hobby or a passion in arts and how much good it does to us. Another example of healing and therapeutic features of Creative Examples of Finger Painting that psychologically indulge in lot of positivity and relaxation putting stress away. It is really amazing how having a love for art and practicing it becomes the reason to keep learning new things. And it is not just the art, that making your life beautiful. It is you (Precisely, your hand and fingers) painting life onto canvas with colors and lots of colors.
Image Source
Image Source
Image Source
Image Source
Image Source
Image Source
Image Source
I remember how my mom taught me drawing a tree using fingers and I loved it. I insist you to teach your kids too and you have these amazingly Creative Examples of Finger Painting that you must try.