When you actually get down to thinking about it, it may strike you
that the person who first started using paper to create works of art
must have been a creative person indeed. He or she must have realized
that paper is comparatively inexpensive, easily accessible and pretty
easy to work with. Or like the great artists of all times, they were
able to see the artistic potential of that bit of paper trying to escape
from it. No matter what their reasons and motivation was, we should be
thankful that there are so many artistic possibilities using the
ubiquitous paper. You have for instance, proper and pretty paper quilling ideas, which is what this article is going to be about. Then you have the simple art of making attractive ornaments from paper which can also be a great deal of fun to do.

And for those among you who do not want to give up on the use of paper for art projects, there is paper cut out art, which is about using paper to create sculpture like effect. However, in this article we will be solely focusing on paper quilling and some tips on how to go about it.
The first thing that you will need to do is collect the supplies you will need to start on paper quilling:

1. A slotted quilling tool
2. A good pair of scissors
3. Quilling glue filled in a bottle with needle tip
4. Tweezers
5. A packet of paper strips for quilling
When you are just starting out in paper quilling, we suggest that you use paper that is at least a quarter of an inch in width to enable you to have a better grip. Once you do master the way to quill, then you can decrease the width of the strips that you will use depending on the work of art that you create.

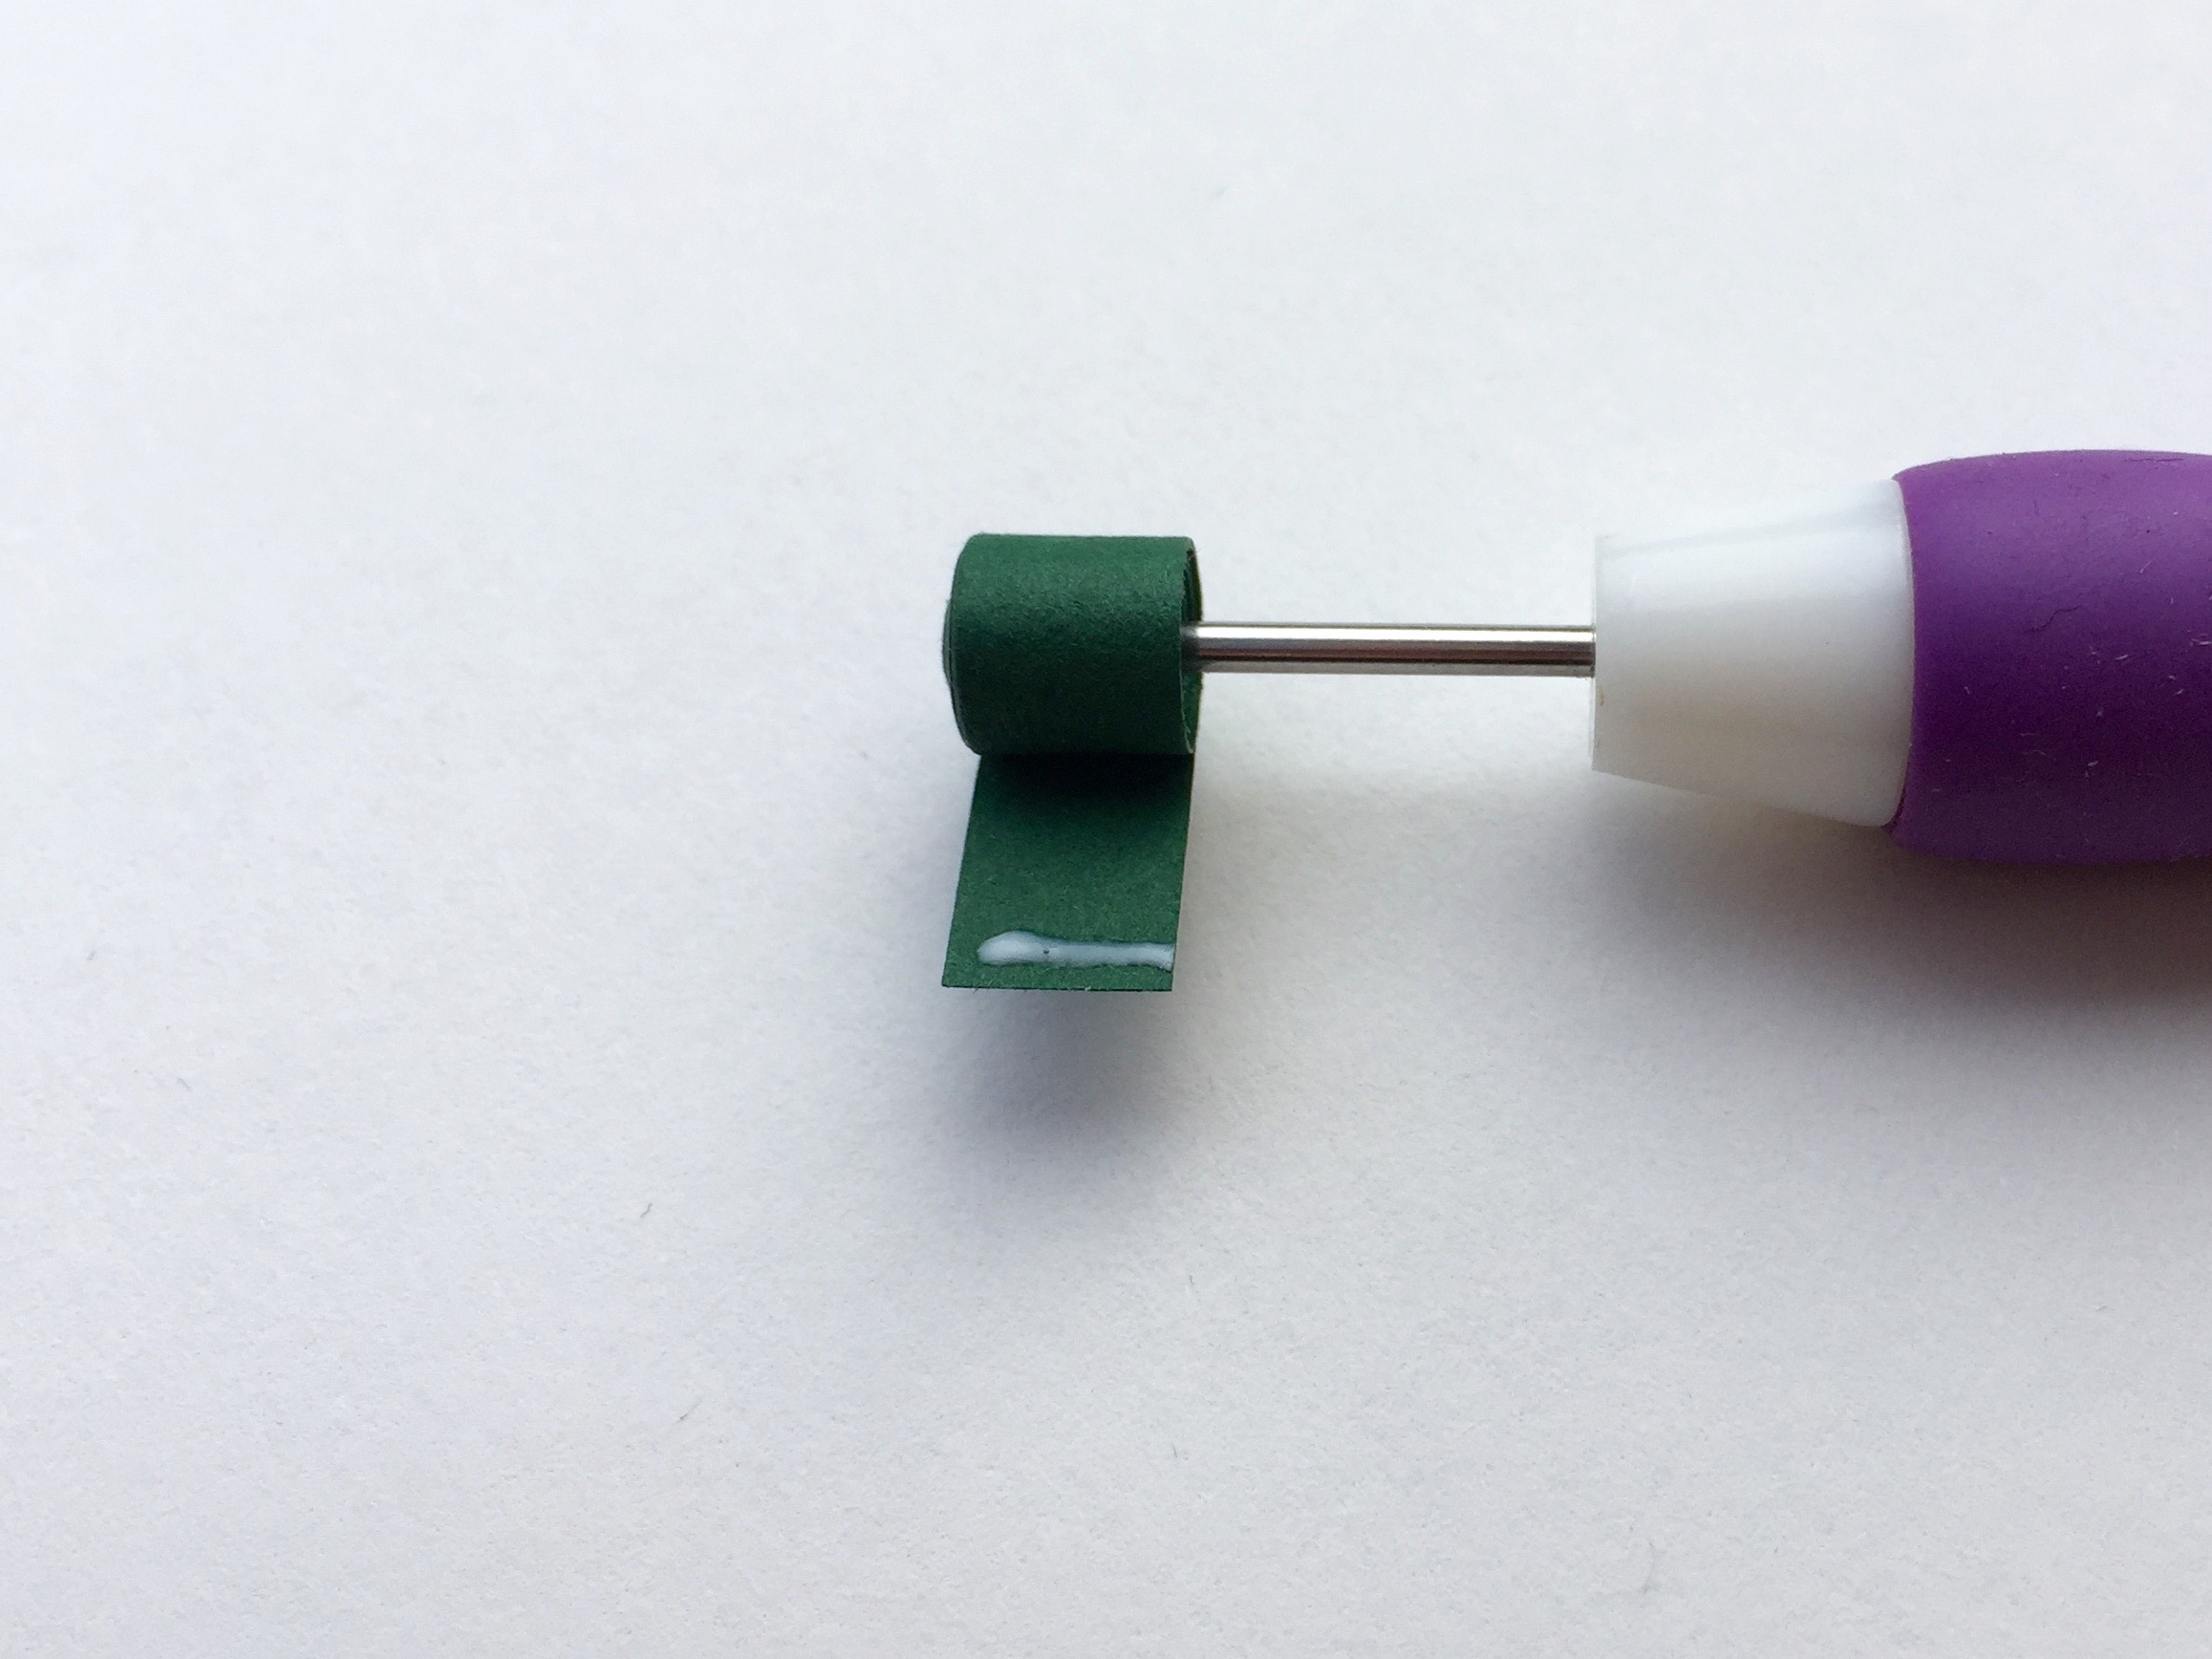
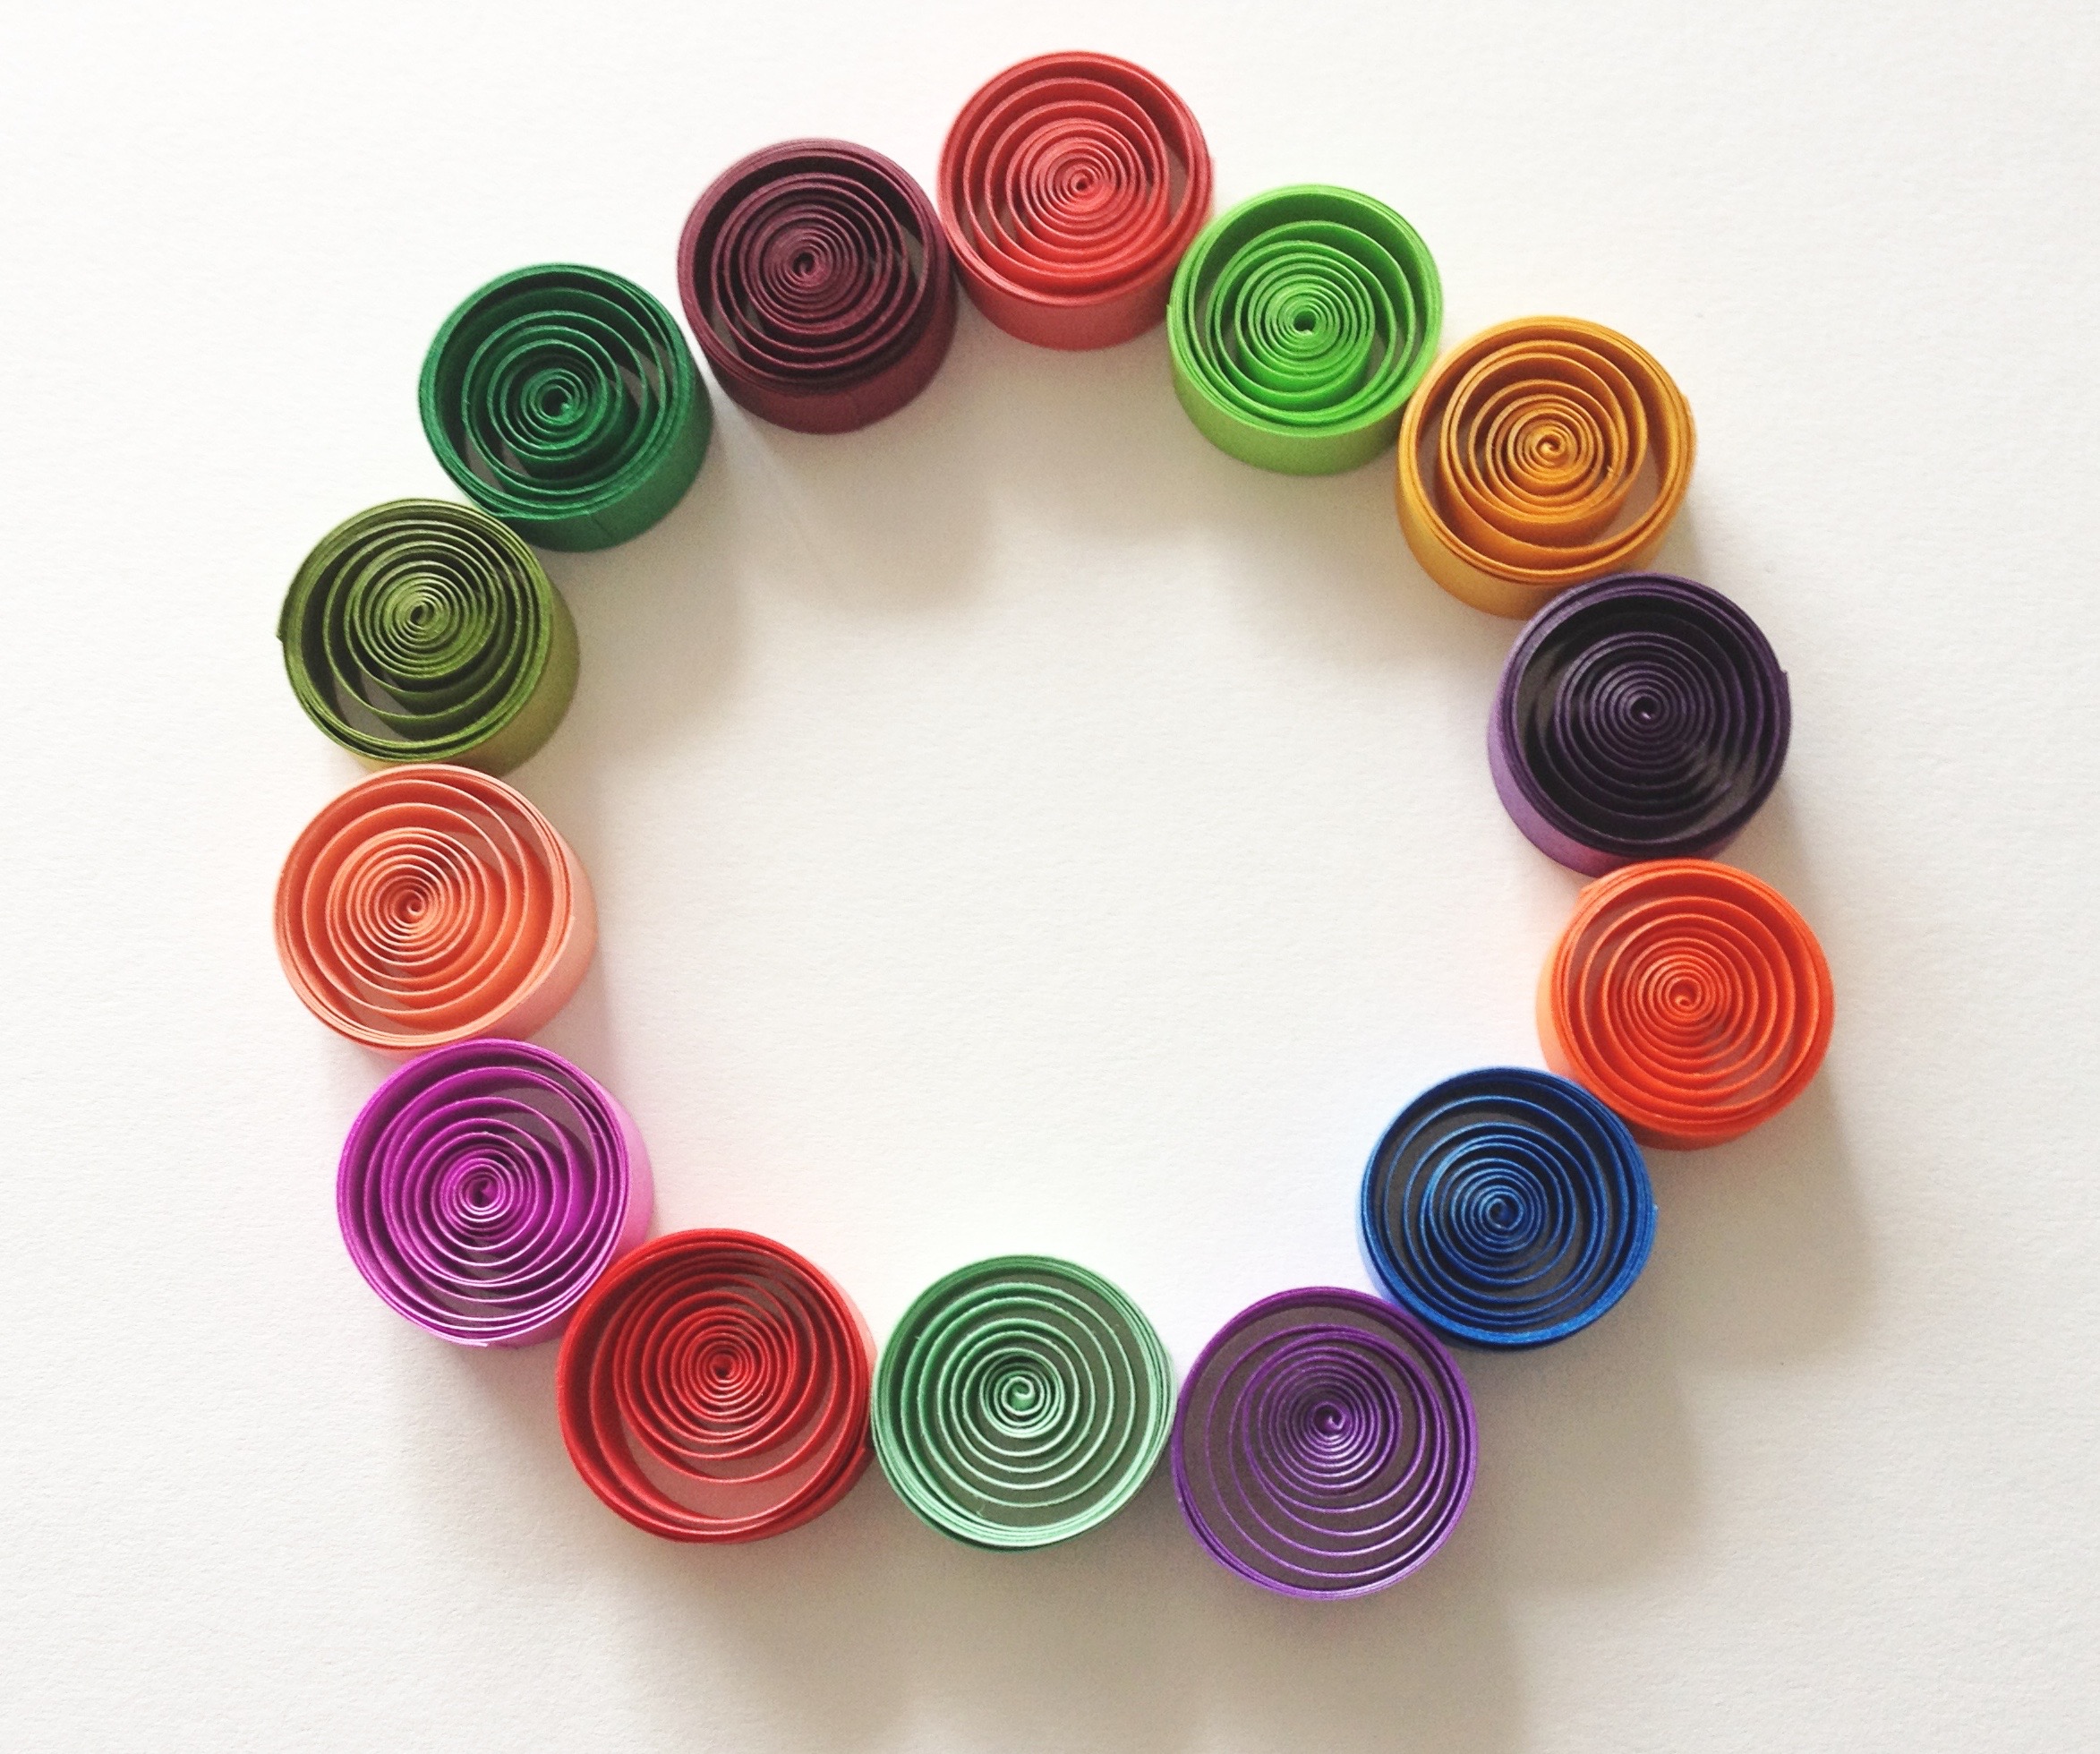
The first step would be to make a simple circle, which would form the base for all other shapes that you will learn. Insert a bit of quilling paper in the slot that is in the tool ensuring that the edge of the paper and that of the slot are aligned as perfectly as possible. Start by rolling the paper towards or away from you using your dominant hand depending on what feels right, while you hold the paper strip with the remaining hand.

Close the roll by placing a thin line of glue at the end of the paper strip and close it to ensure that you have a tight coil before removing the quilling tool. Likewise, when you want the coil to be looser, let the roll expand a bit before sticking it closed. You have to remember that you are working with paper here, so once the basic roll is done, it is a matter of gentle or firm pressing and creating corners to make different shapes.
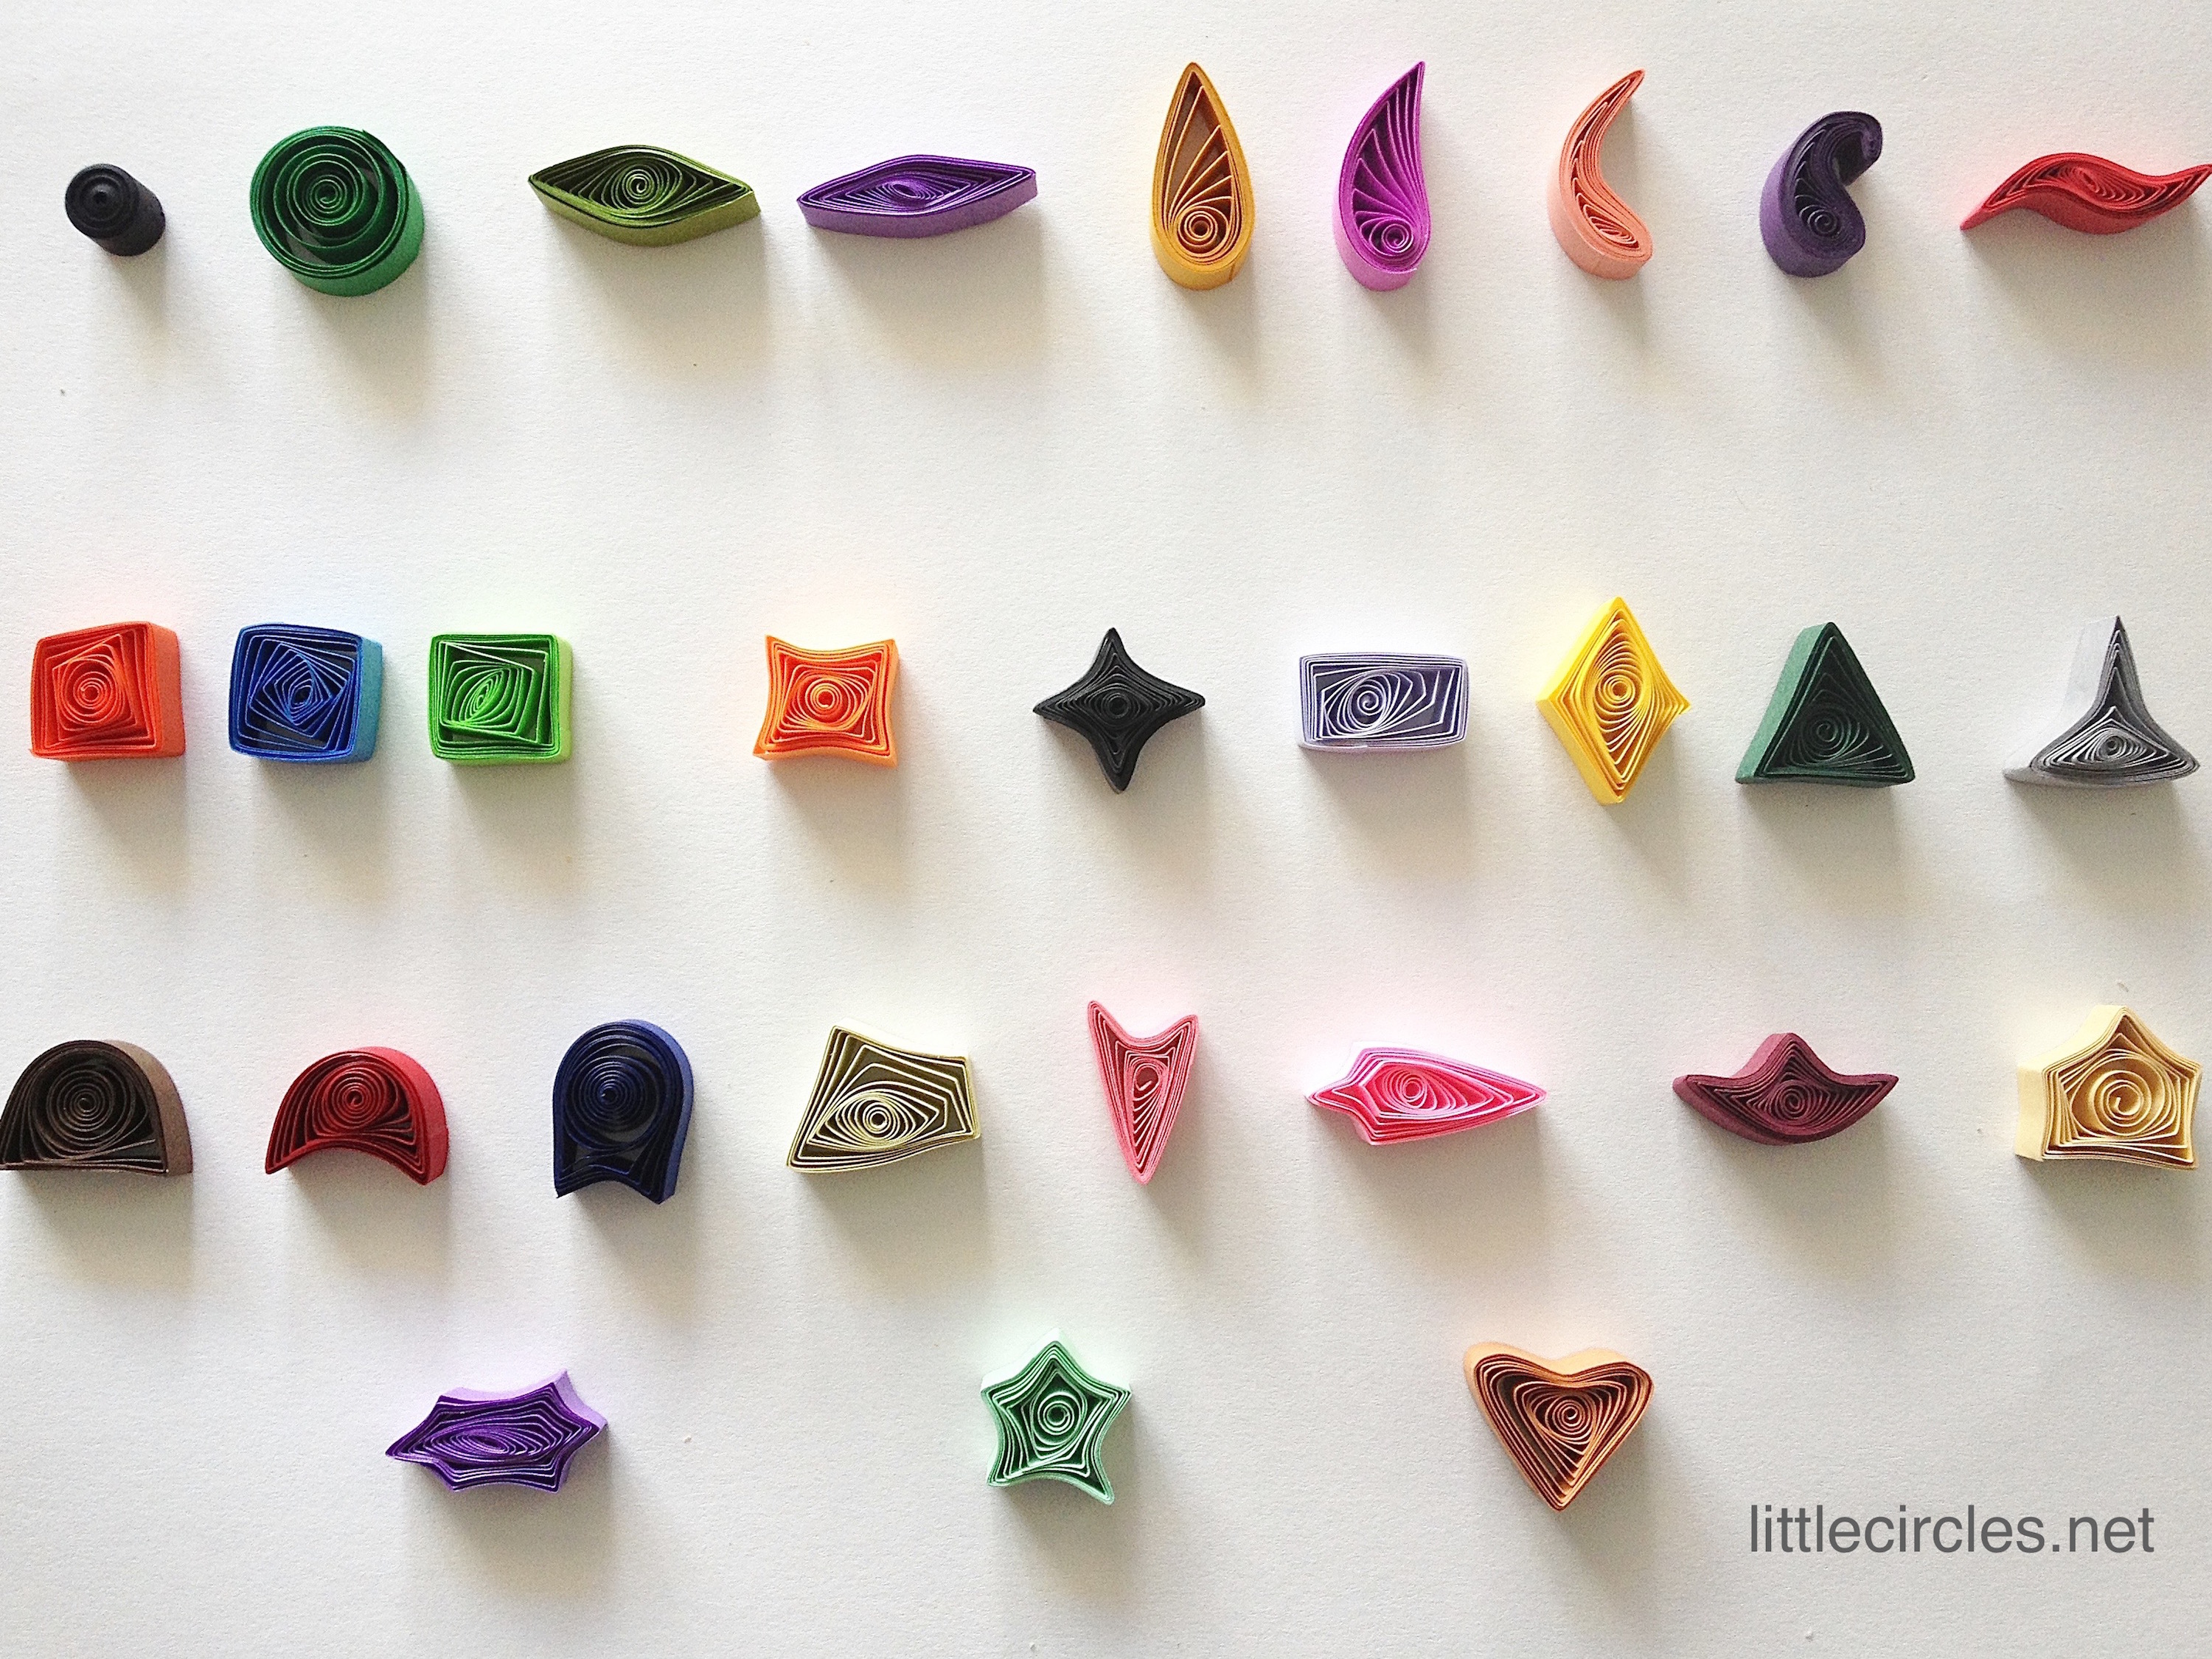
Some of the shapes that you could make include:


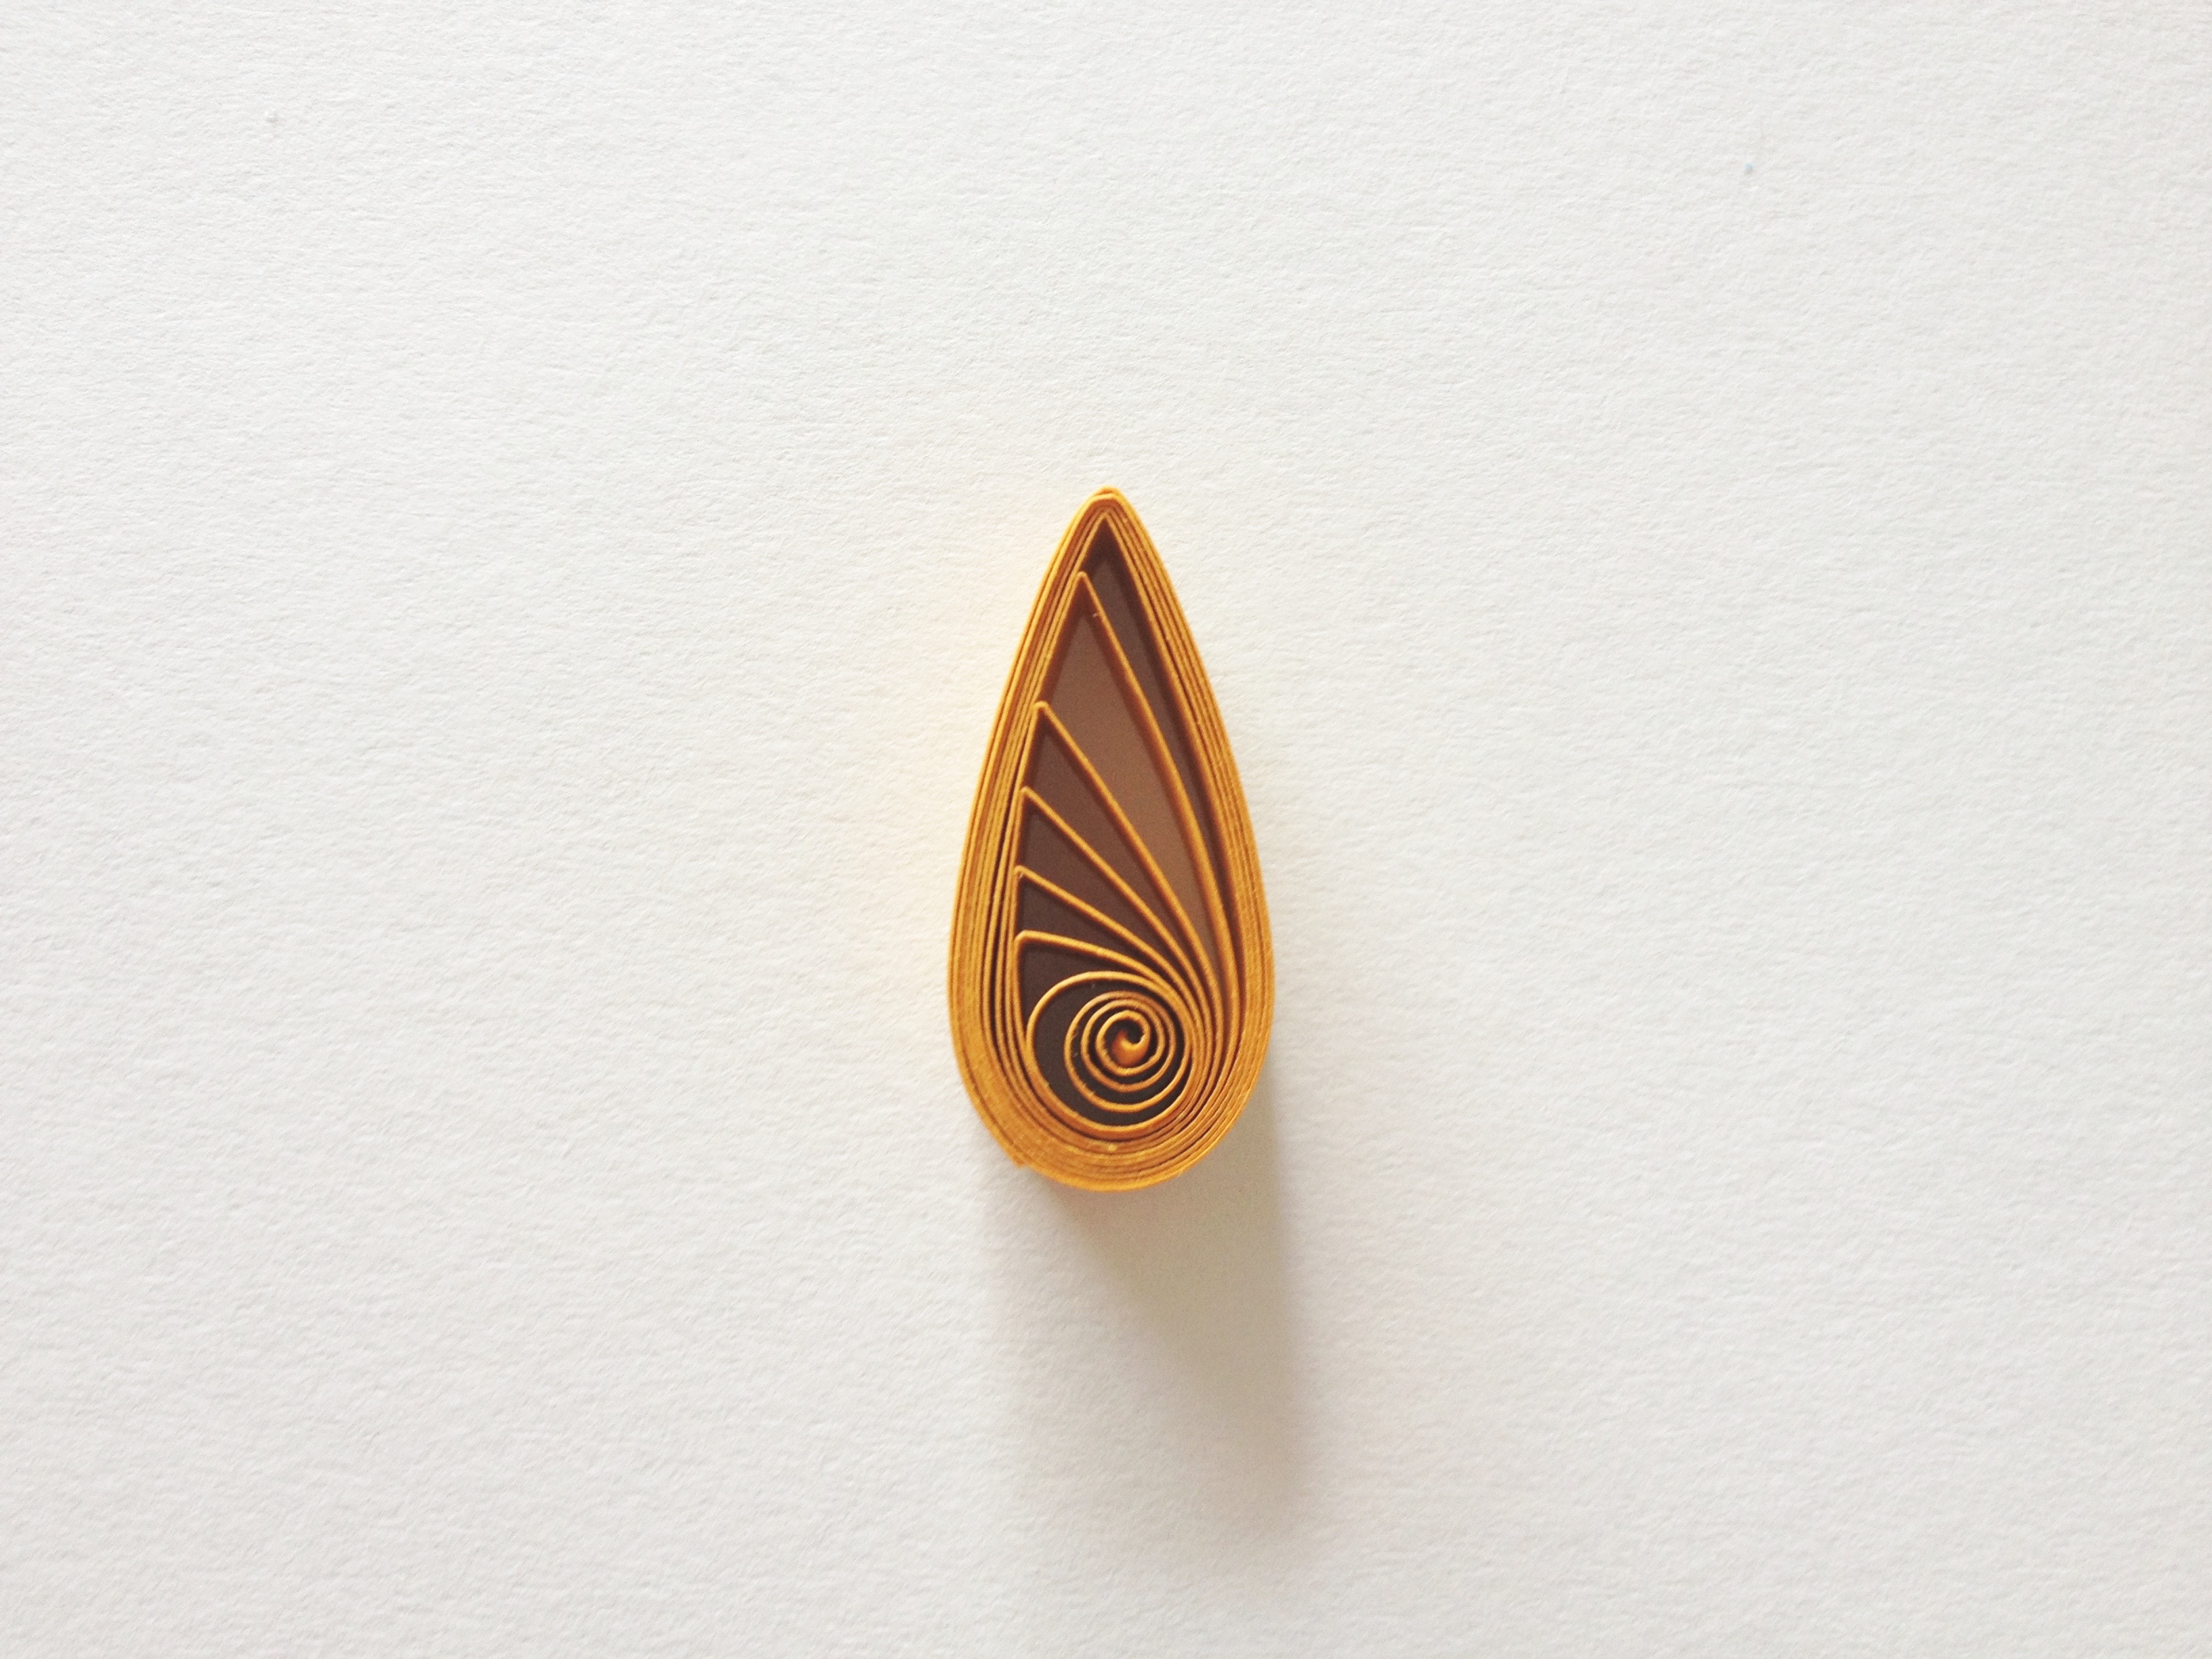
Variations of the teardrop
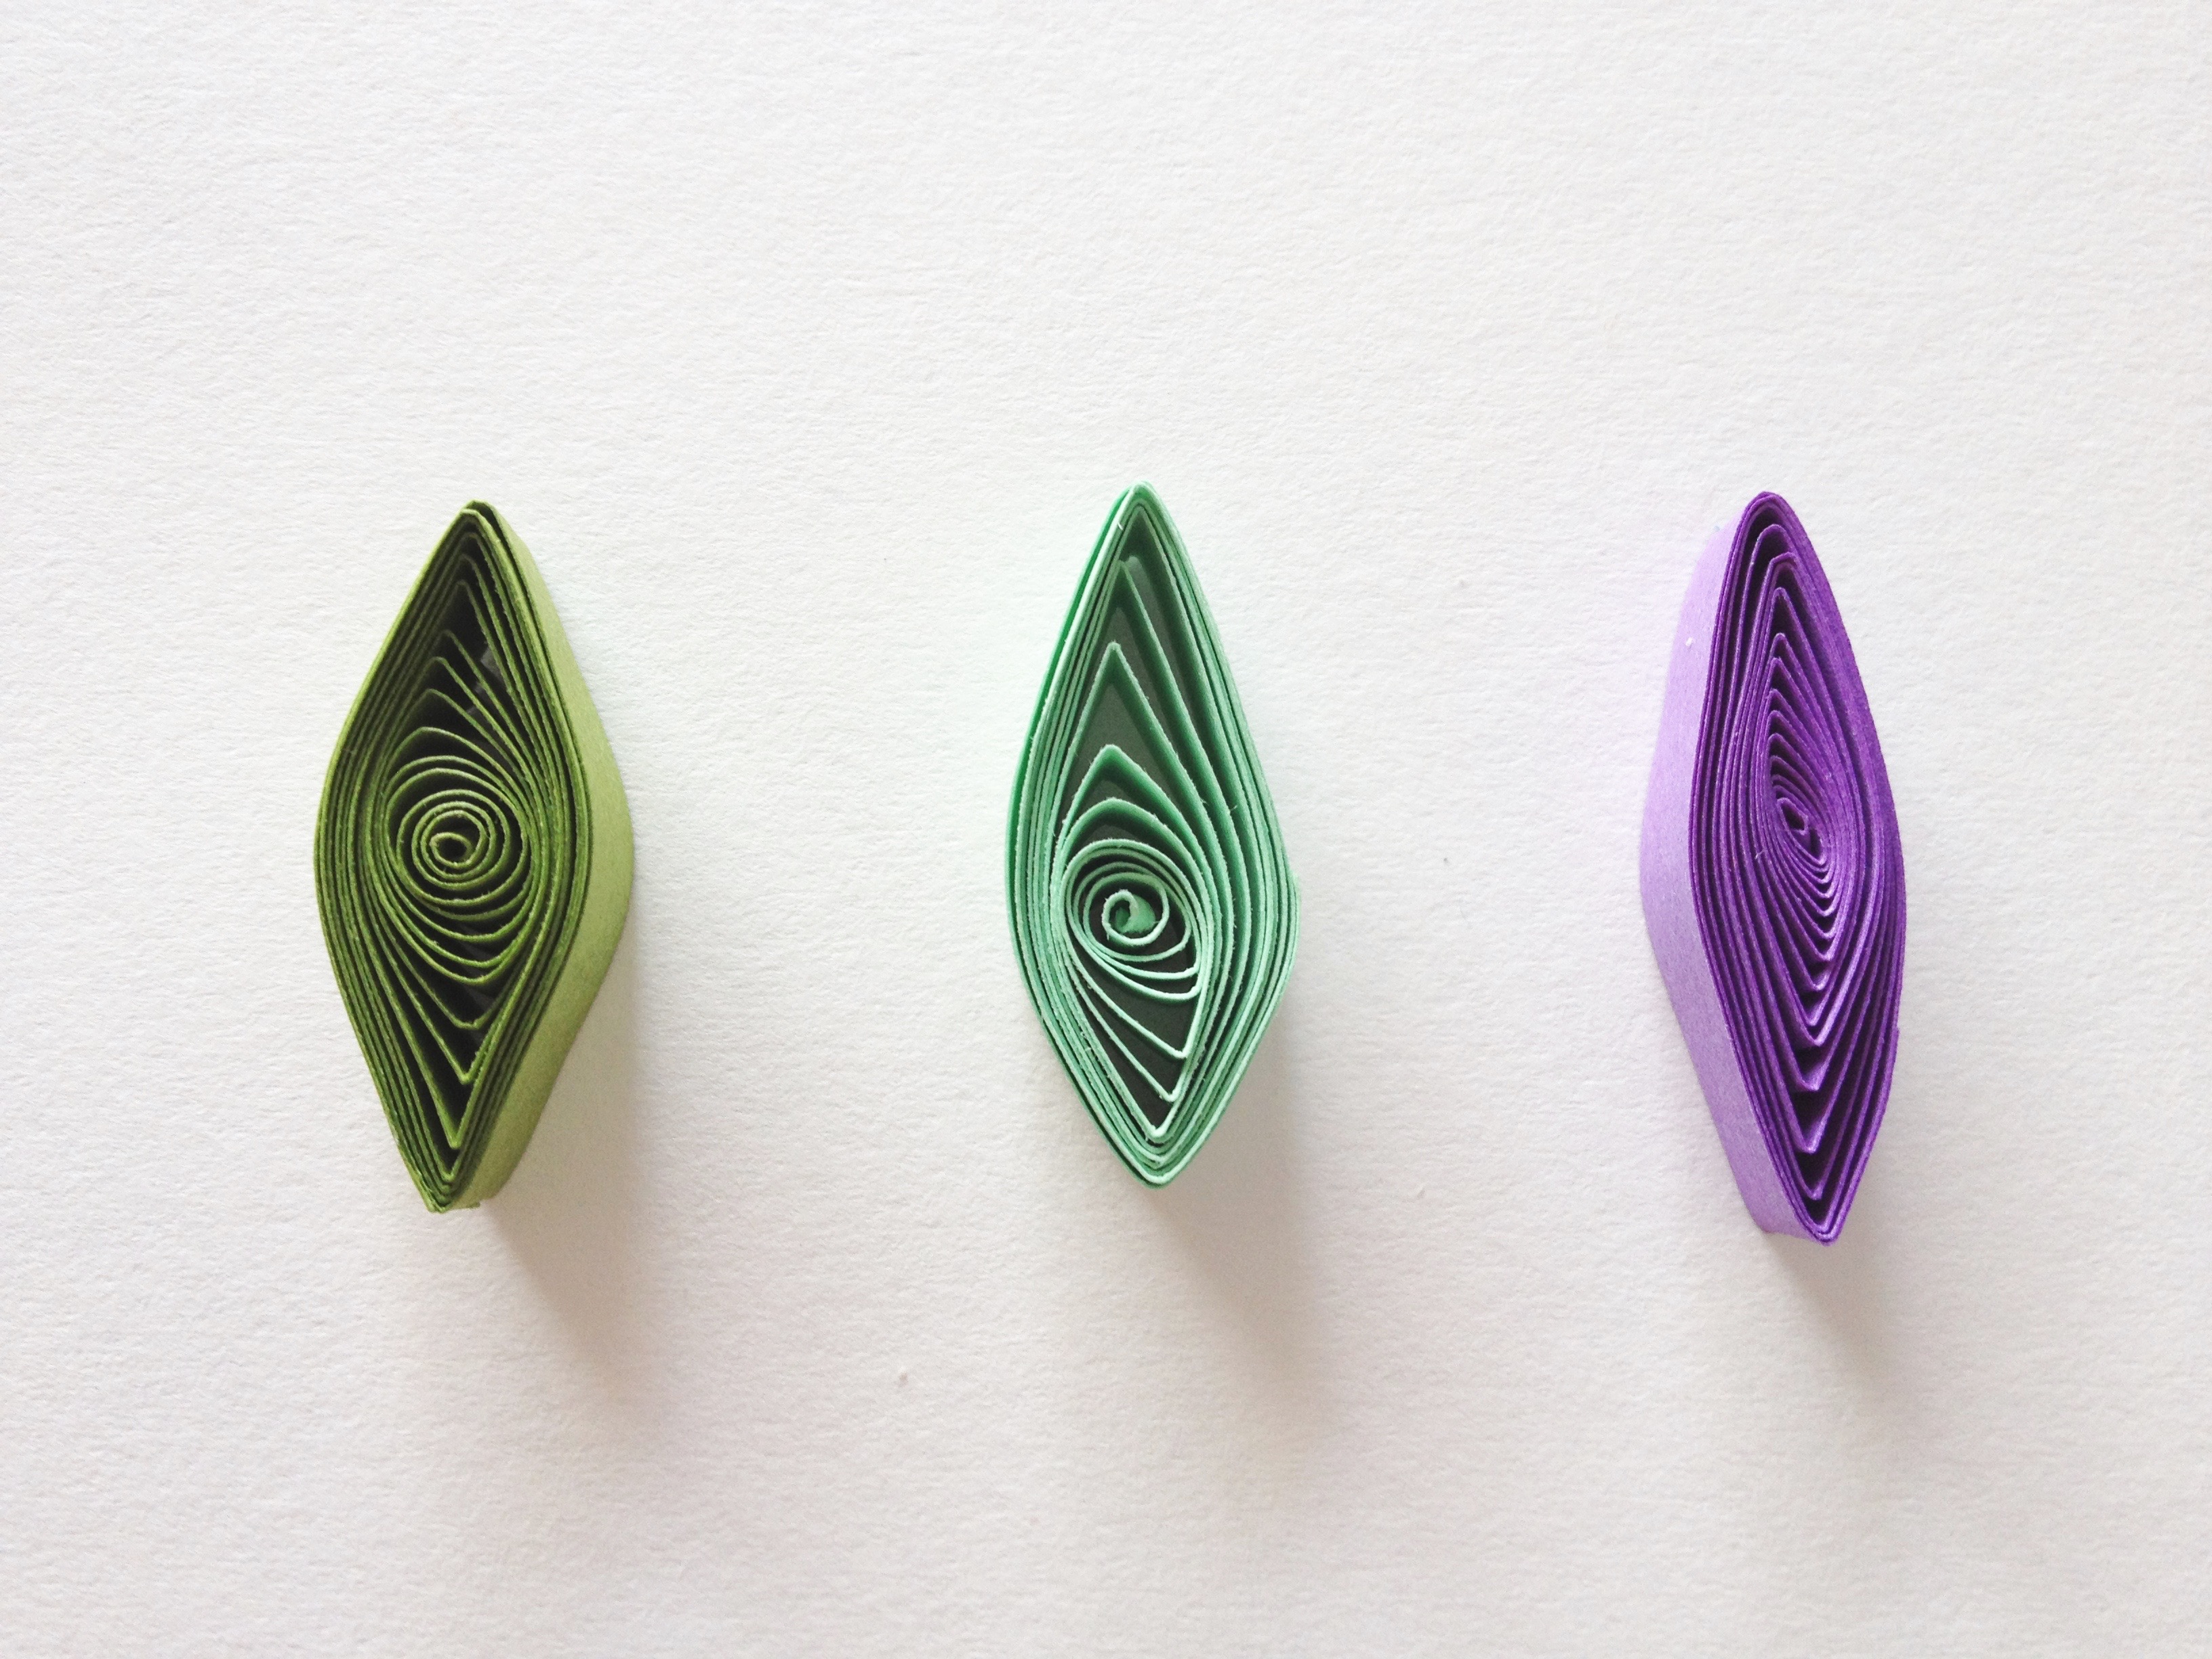
A marquis
Tulip shape
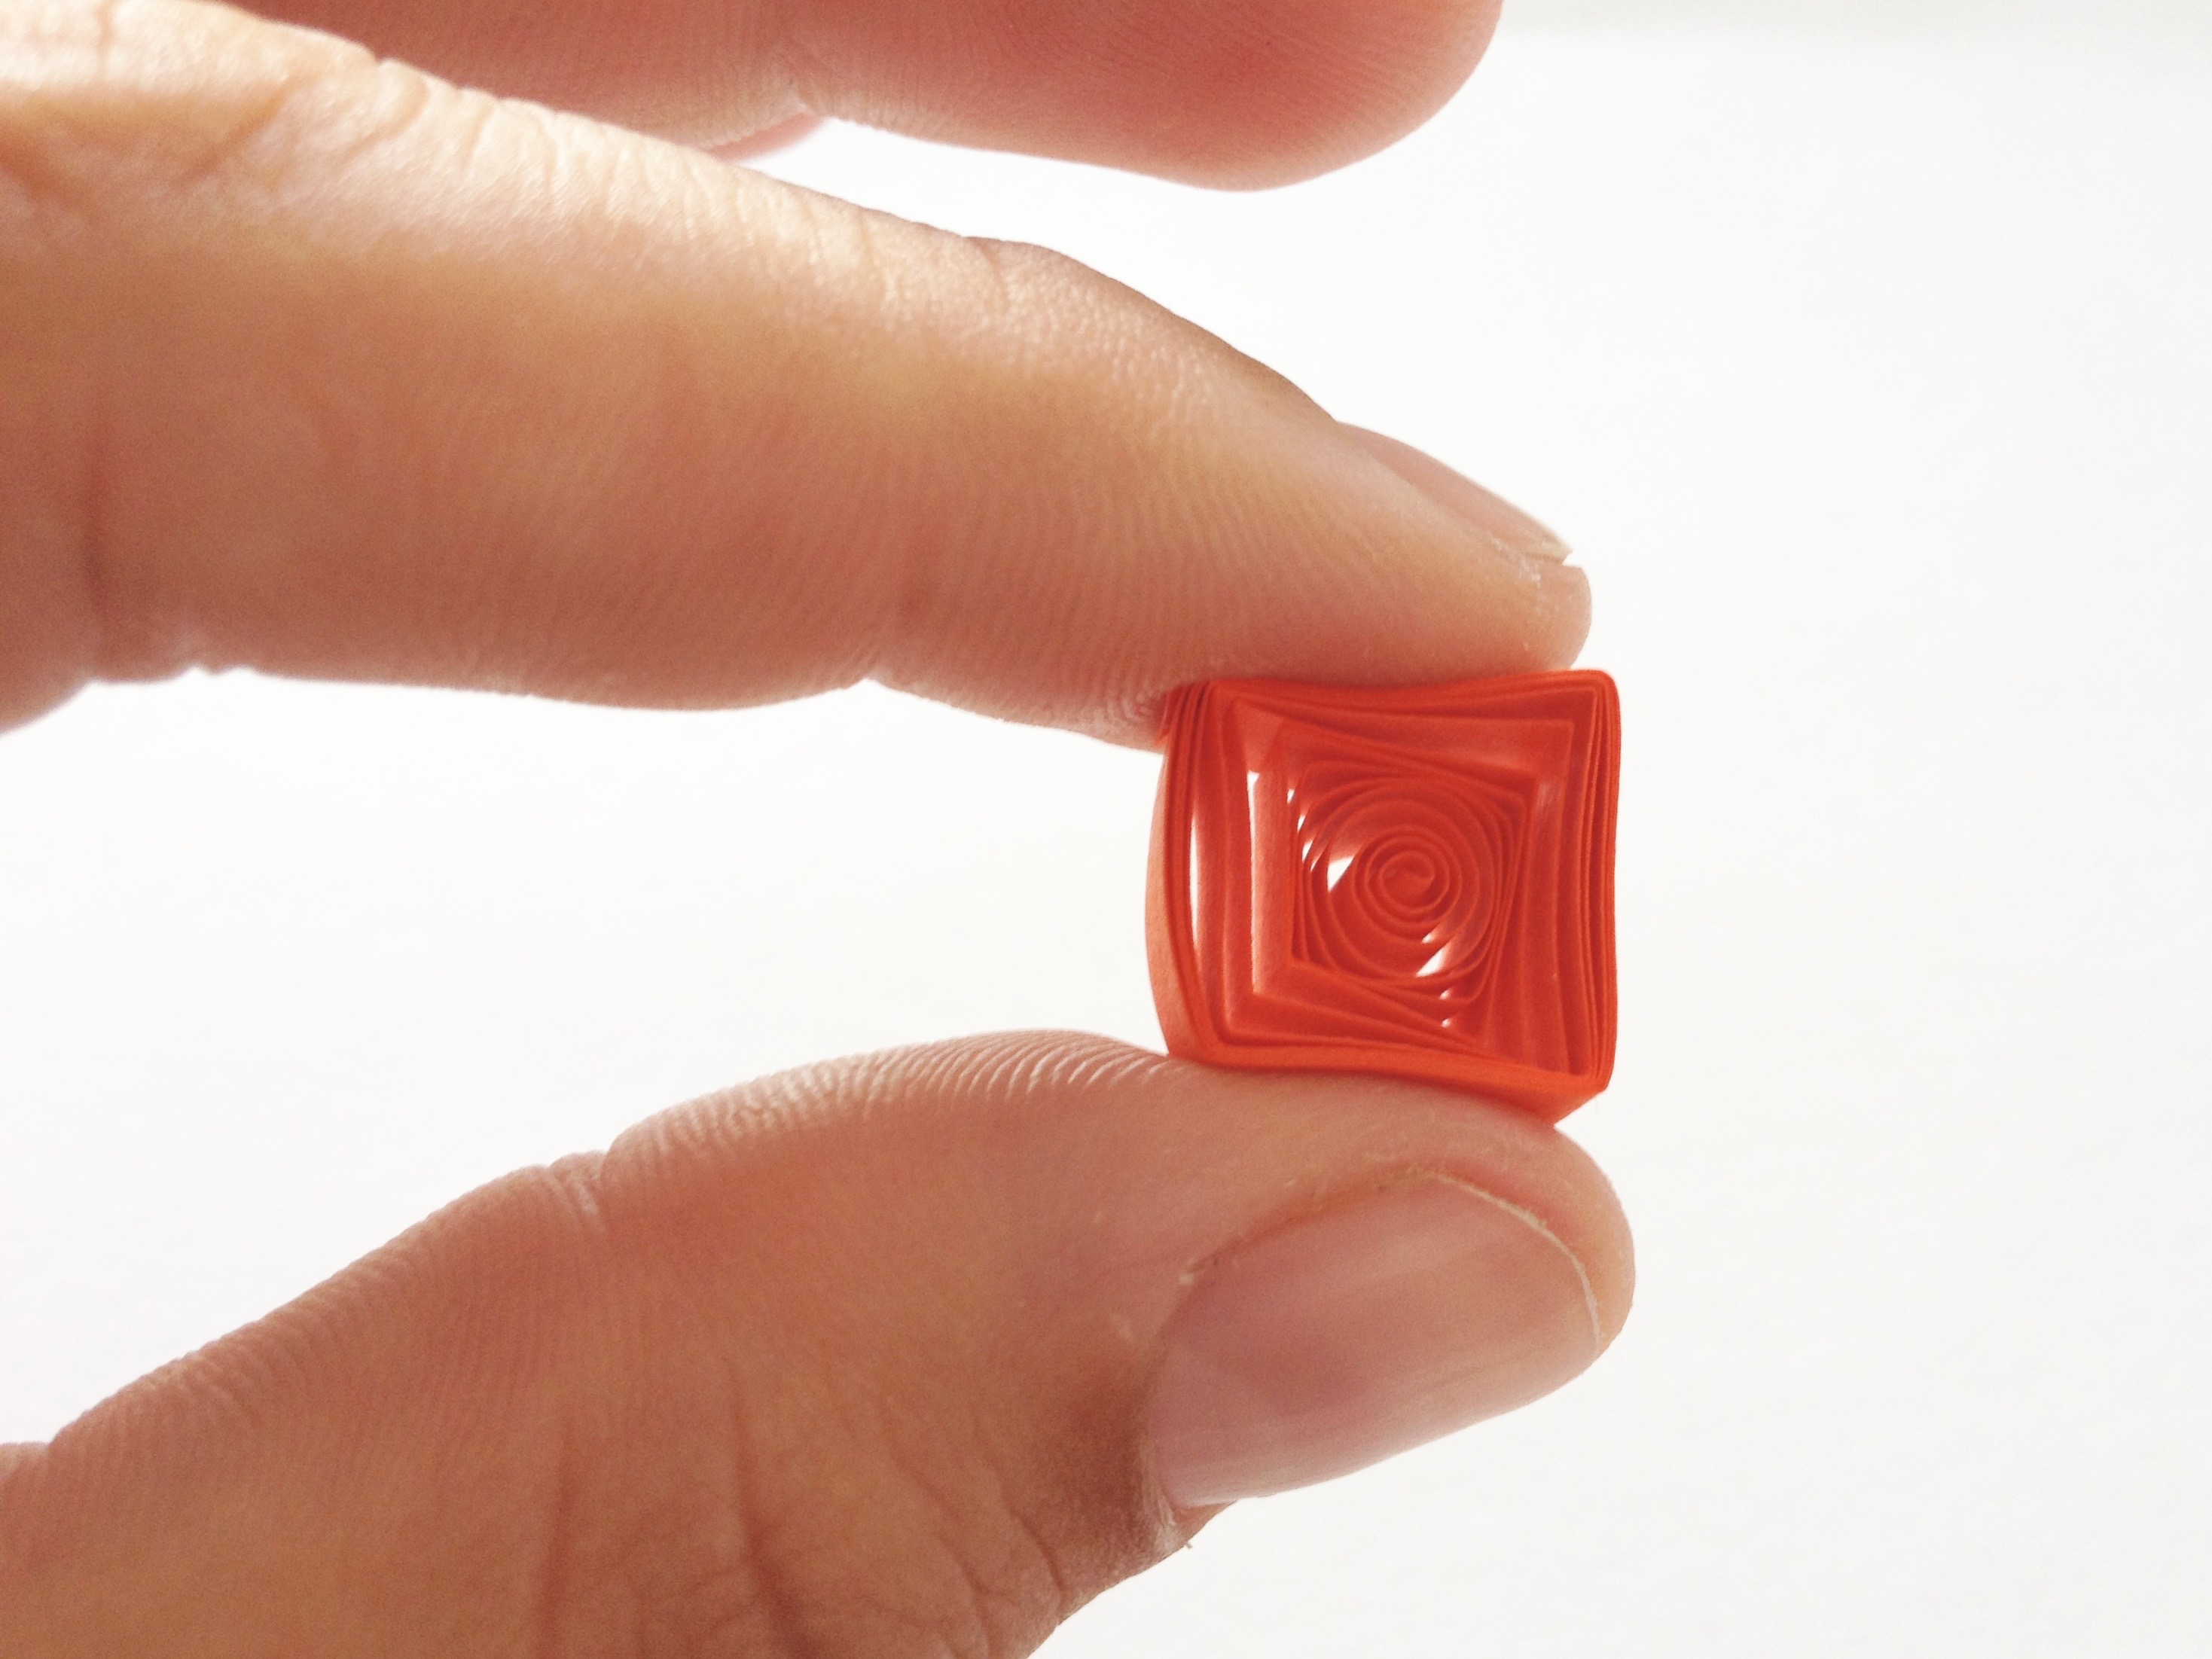
Diamond or square quill along with variations
Rectangle and its variations
A semi-circle
A triangle
A slug
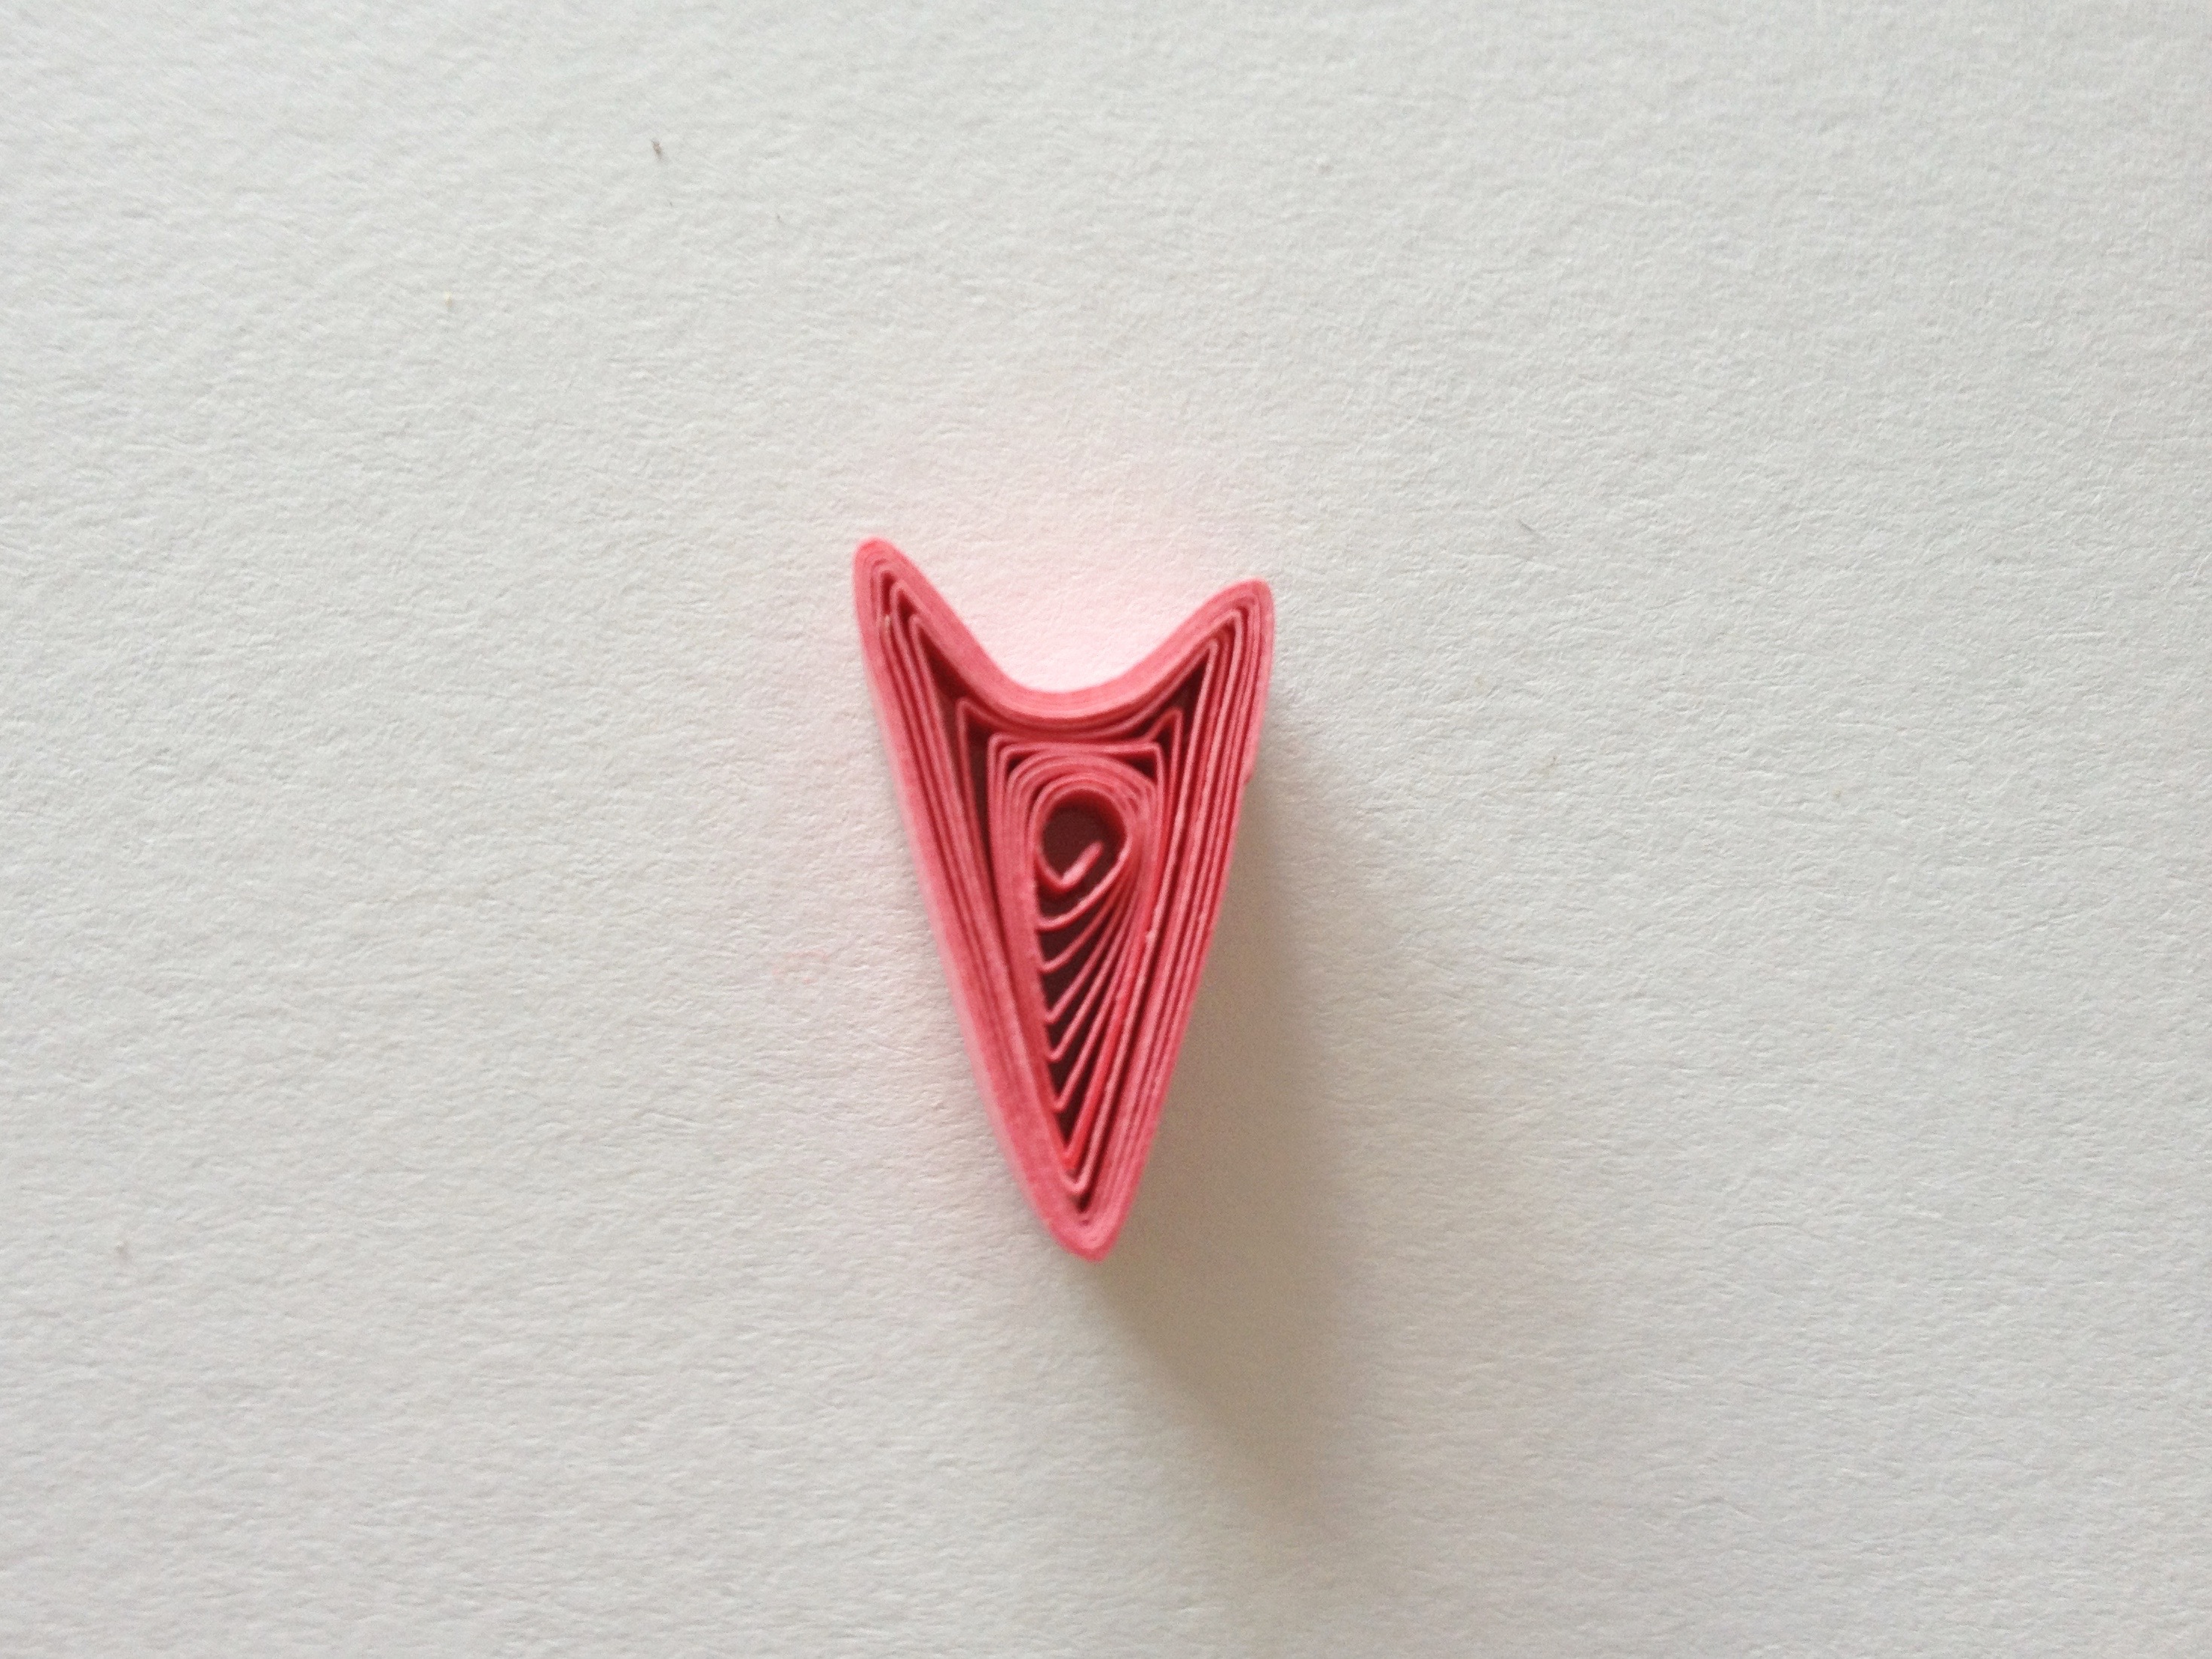
An arrowhead
Heart shaped quill
Pentagon and star shapes
A holly leaf
As may be evident from the pictures, each of the shapes comes out of the basic paper quill that you made. Once you have mastered the different quilling shapes, then it comes down to how you use them. Many people use paper quilled shapes to make personalized greeting cards by sticking them on a thick piece of cardboard to make a certain design or others may use it to create a slightly three dimensional work of art to hang on their walls.
Bored Art.
And for those among you who do not want to give up on the use of paper for art projects, there is paper cut out art, which is about using paper to create sculpture like effect. However, in this article we will be solely focusing on paper quilling and some tips on how to go about it.
The first thing that you will need to do is collect the supplies you will need to start on paper quilling:

1. A slotted quilling tool
2. A good pair of scissors
3. Quilling glue filled in a bottle with needle tip
4. Tweezers
5. A packet of paper strips for quilling
When you are just starting out in paper quilling, we suggest that you use paper that is at least a quarter of an inch in width to enable you to have a better grip. Once you do master the way to quill, then you can decrease the width of the strips that you will use depending on the work of art that you create.
The first step would be to make a simple circle, which would form the base for all other shapes that you will learn. Insert a bit of quilling paper in the slot that is in the tool ensuring that the edge of the paper and that of the slot are aligned as perfectly as possible. Start by rolling the paper towards or away from you using your dominant hand depending on what feels right, while you hold the paper strip with the remaining hand.
Close the roll by placing a thin line of glue at the end of the paper strip and close it to ensure that you have a tight coil before removing the quilling tool. Likewise, when you want the coil to be looser, let the roll expand a bit before sticking it closed. You have to remember that you are working with paper here, so once the basic roll is done, it is a matter of gentle or firm pressing and creating corners to make different shapes.
Some of the shapes that you could make include:


Variations of the teardrop
A marquis
Tulip shape
Diamond or square quill along with variations
Rectangle and its variations
A semi-circle
A triangle
A slug
An arrowhead
Heart shaped quill
Pentagon and star shapes
A holly leaf
As may be evident from the pictures, each of the shapes comes out of the basic paper quill that you made. Once you have mastered the different quilling shapes, then it comes down to how you use them. Many people use paper quilled shapes to make personalized greeting cards by sticking them on a thick piece of cardboard to make a certain design or others may use it to create a slightly three dimensional work of art to hang on their walls.
Bored Art.
Paper Quilling Tutorials – Learn How To Create Some Paper Magic
4/
5
Oleh
Chandu Numerology


